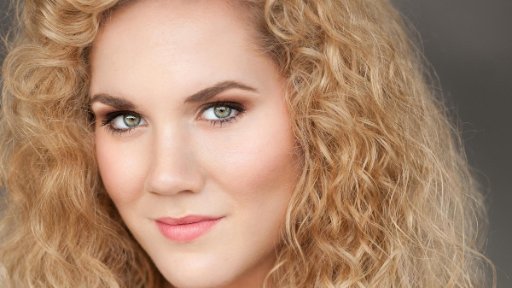
One of the biggest challenges in beauty, portrait and fashion photography is skin retouching.
Dodge & Burn is the key retouching technique that all professional retouchers use to make the surface of the skin look healthy and even, while maintaining its true texture and detail in their images. If your goal is to become proficient at retouching, you should absolutely undoubtably focus on mastering this important technique.
In our 4-part intensive course, we take a deep dive into the Dodge & Burn technique with the author, Fashion, Beauty & Portrait Photographer and Retoucher Michael Woloszynowicz. Michael is one of the leading Retouching Academy instructors and Fstoppers writers, globally known for not only his top-quality work, but also his super accessible style of teaching.
So, if you have been struggling with Dodging & Burning, this course will be a quick ride to your D&B breakthrough
Description
In this 4-part intensive course we’ll be taking a deep dive into one of the most important tools and techniques in retouching known as Dodging and Burning (D&B). Dodging and Burning is essentially the manipulation of luminosity in order to refine skin, fabrics and other elements as well as adding local contrast in order to create a more 3-dimensional looking image.
While the concept of Dodging and Burning is quite simple, the practical implementation requires a good degree of knowledge and practice. We’ll talk about some of the key situations in which D&B is useful and what makes it such a powerful tool for skin retouching in the context of portraits, beauty and fashion photography.
We’ll look at practical examples across a variety of images and go beyond luminosity changes to show you how to overcome resulting or existing color problems.
Although D&B is considered a fundamental tool for retouchers, this is not a beginners course and thus requires some basic knowledge of Photoshop tools, layers and masks. Despite these pre-requisites we do present each concept from start to finish along with all the necessary layer and brush settings, so you can easily apply the same concepts to your own work.
COURSE DESCRIPTION
Lesson 1: Introduction to Dodging and Burning
Duration: 44:40 min
Before we dive into practical examples of D&B, we first have to discuss some prerequisites and talk about where it fits within the bigger picture of retouching an image. We’ll look at why D&B is such a powerful concept and introduce you to the tools and settings you’ll be using throughout the remainder of the course while looking at a few different sample images.
The underlying theory behind D&B, what it is, how it works, why it is so important and how it compares to some other techniques out there
The elements of an image: Hue, Saturation & Luminosity
Local or Corrective D&B
Global D&B or Contouring
D&B vs. Other Retouching Techniques
D&B types within your workflow
Tools & Layers for your D&B work
Working with Curves Adjustment Layers for Corrective D&B and Contouring
Working with 50% Gray Layers for Corrective D&B and Contouring
D&B as a part of your retouching workflow
Lesson 2: Corrective (Local) Dodge & Burn
Duration: 41:54 min
In this lesson we’ll delve into the implementation of D&B at a localized or corrective level and use it to refine luminosity shifts in the skin and make it look flawless. We’ll explore the technique in a detailed example as well as look at how it can be combined with tools such as the Healing Brush to refine wrinkles in fabrics.
In addition to walking you through the application, we’ll also show you some pitfalls to avoid that can often lead to unnatural results.
Sample Pages from the Master-D&B-Guide.pdf
Sample Pages from the Master-D&B-Guide.pdf
Lesson 3: Contouring (Global Dodge & Burn)
Duration: 44:53 min
In this lesson we’ll be exploring the concept of contouring or global D&B.
We’ll look at how to emphasize the key features of the face and body to add more depth and dimension to the image, ultimately giving it a more three-dimensional appearance.
We begin this lesson by looking at a completed beauty image, and then move on to completing our black and white image from lesson two.
Finally, we wrap up the lesson by contouring a color image to serve as an extra example of the technique. In addition to the standard contouring, we’ll also look at how to approach cases of reshaping areas of the face using light and the best strategy for organizing your layers when doing so.
Sample Pages from the Master-D&B-Guide.pdf
Sample Pages from the Master-D&B-Guide.pdf
Lesson 4: Color Corrections and Finishing Touches
Duration: 50:11 min
In our final lesson, we’ll be putting finishing touches on our images, particularly from a color standpoint.
While our focus with D&B is the correction of luminosity shifts, it doesn’t necessarily free us from ignoring color completely. Although this isn’t a course on color correction tools, we do spend a fair bit of time talking about how to identify color issues and discuss some of the most useful tools for correcting them.
We’ll also explore how to use D&B to work on details such as harsh shadows, dark spots in the whites of the eye as well as “peach fuzz” on the face, and deal with the resulting color problems in those areas.
Bonus Materials:
Michael’s D&B Actions
RA D&B Tool Presets for D&B Brushes
Practice file (Fabrics)
Practice file (Beauty portrait)







Reviews
There are no reviews yet.